From PC or Laptop
This page will consist of a glimpse of the details of the card you are customising.
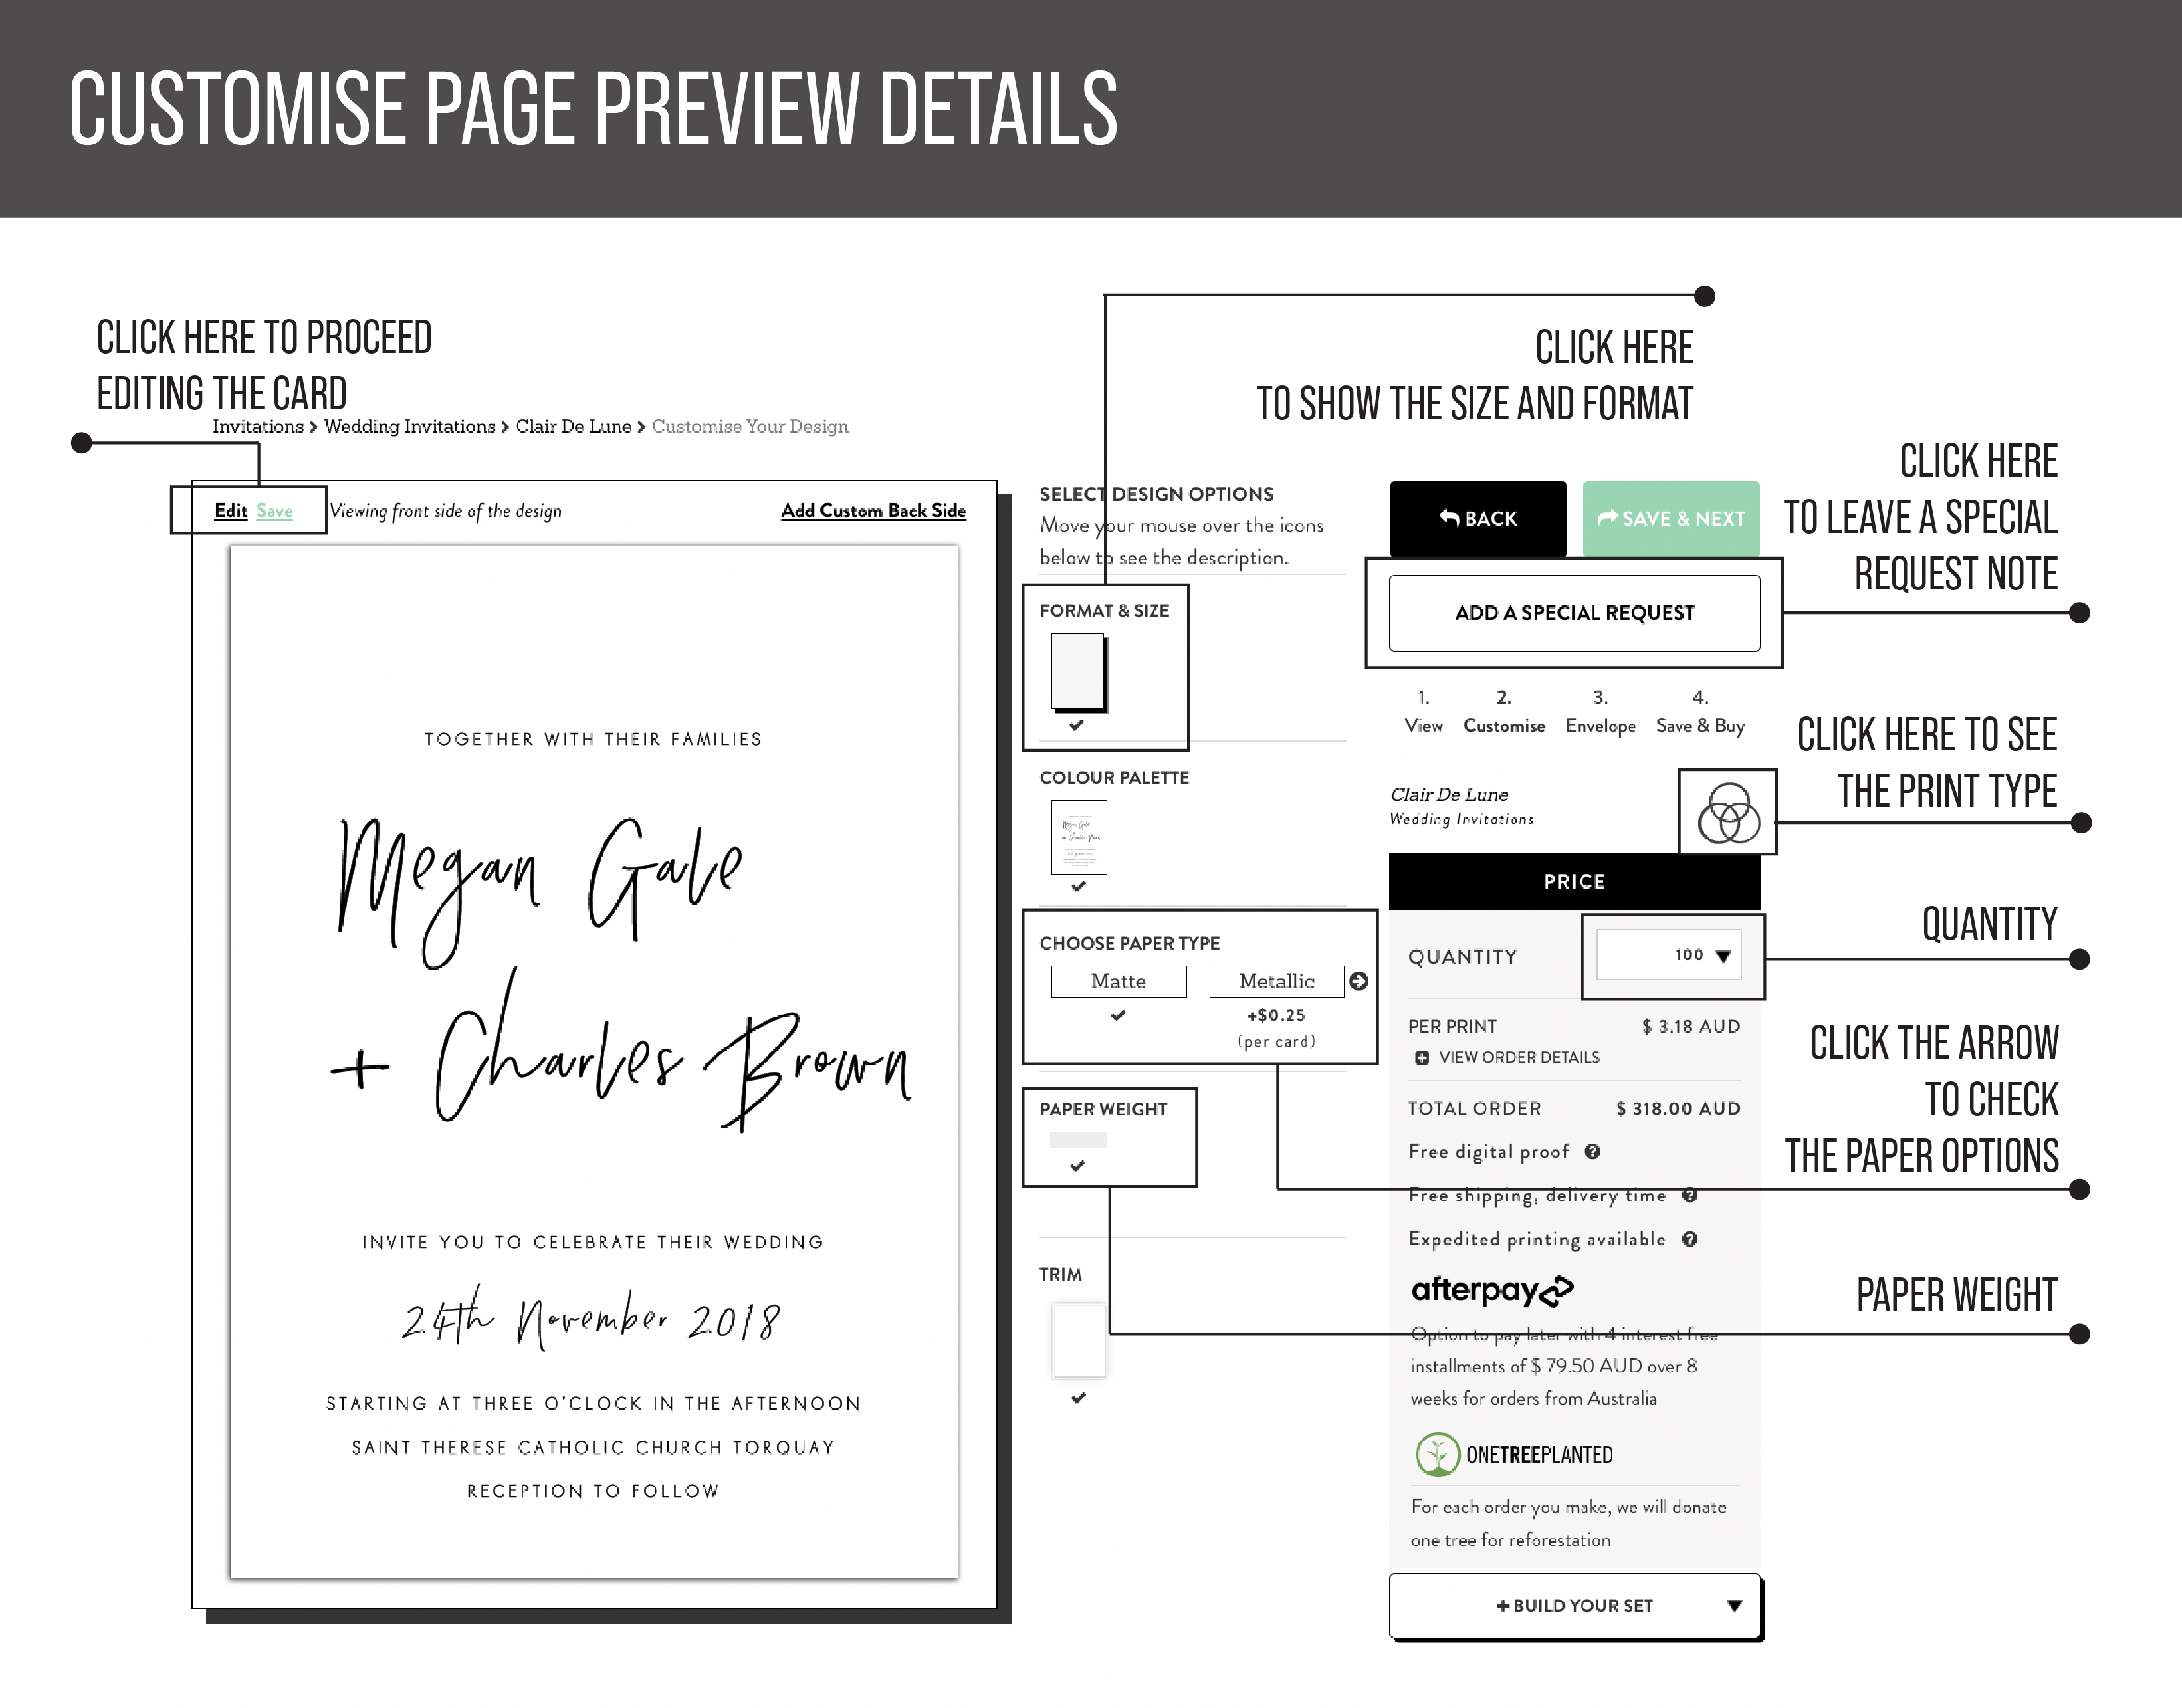
Once you click ‘Edit’, you will be able to play with our editing tools.
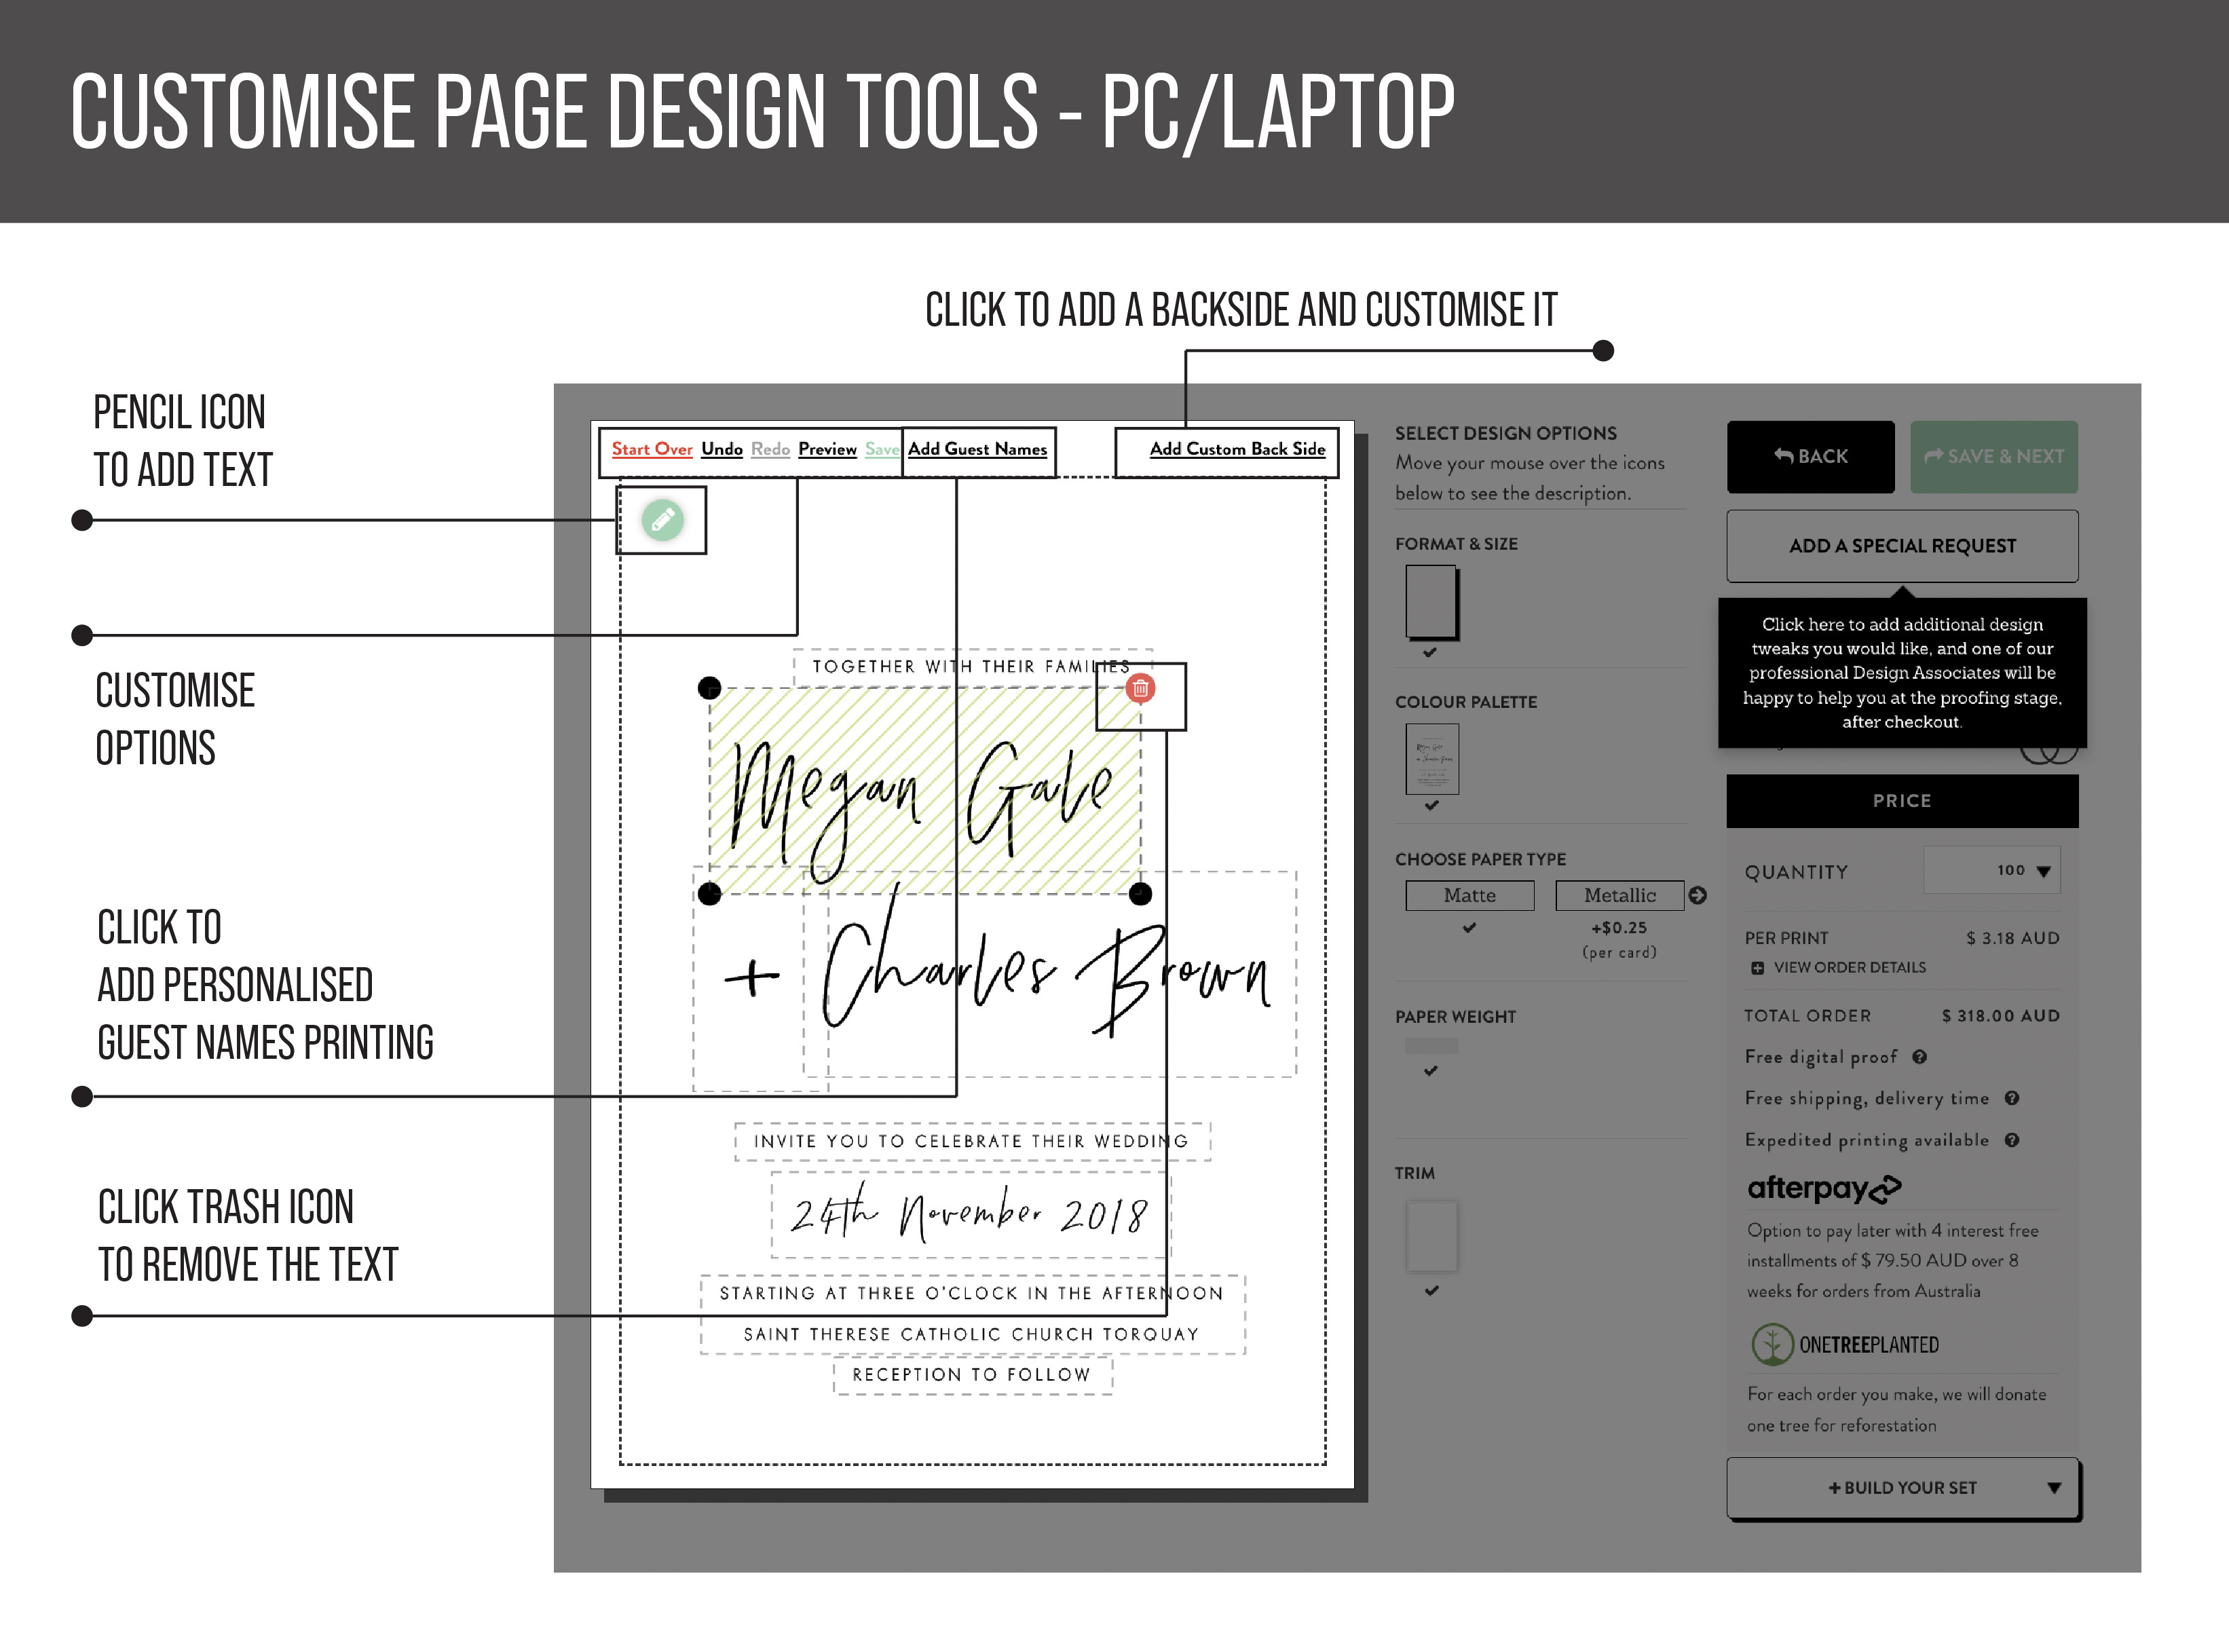
Customise the wording
1. Click any text box.
2. There will be a pop-up box appearing, you change the wording here.
3. You can also adjust the font size and change the font type.
4. Click ‘Apply’ to save the changes.
5. You can move the text boxes around by dragging the texts until you're happy with their positions.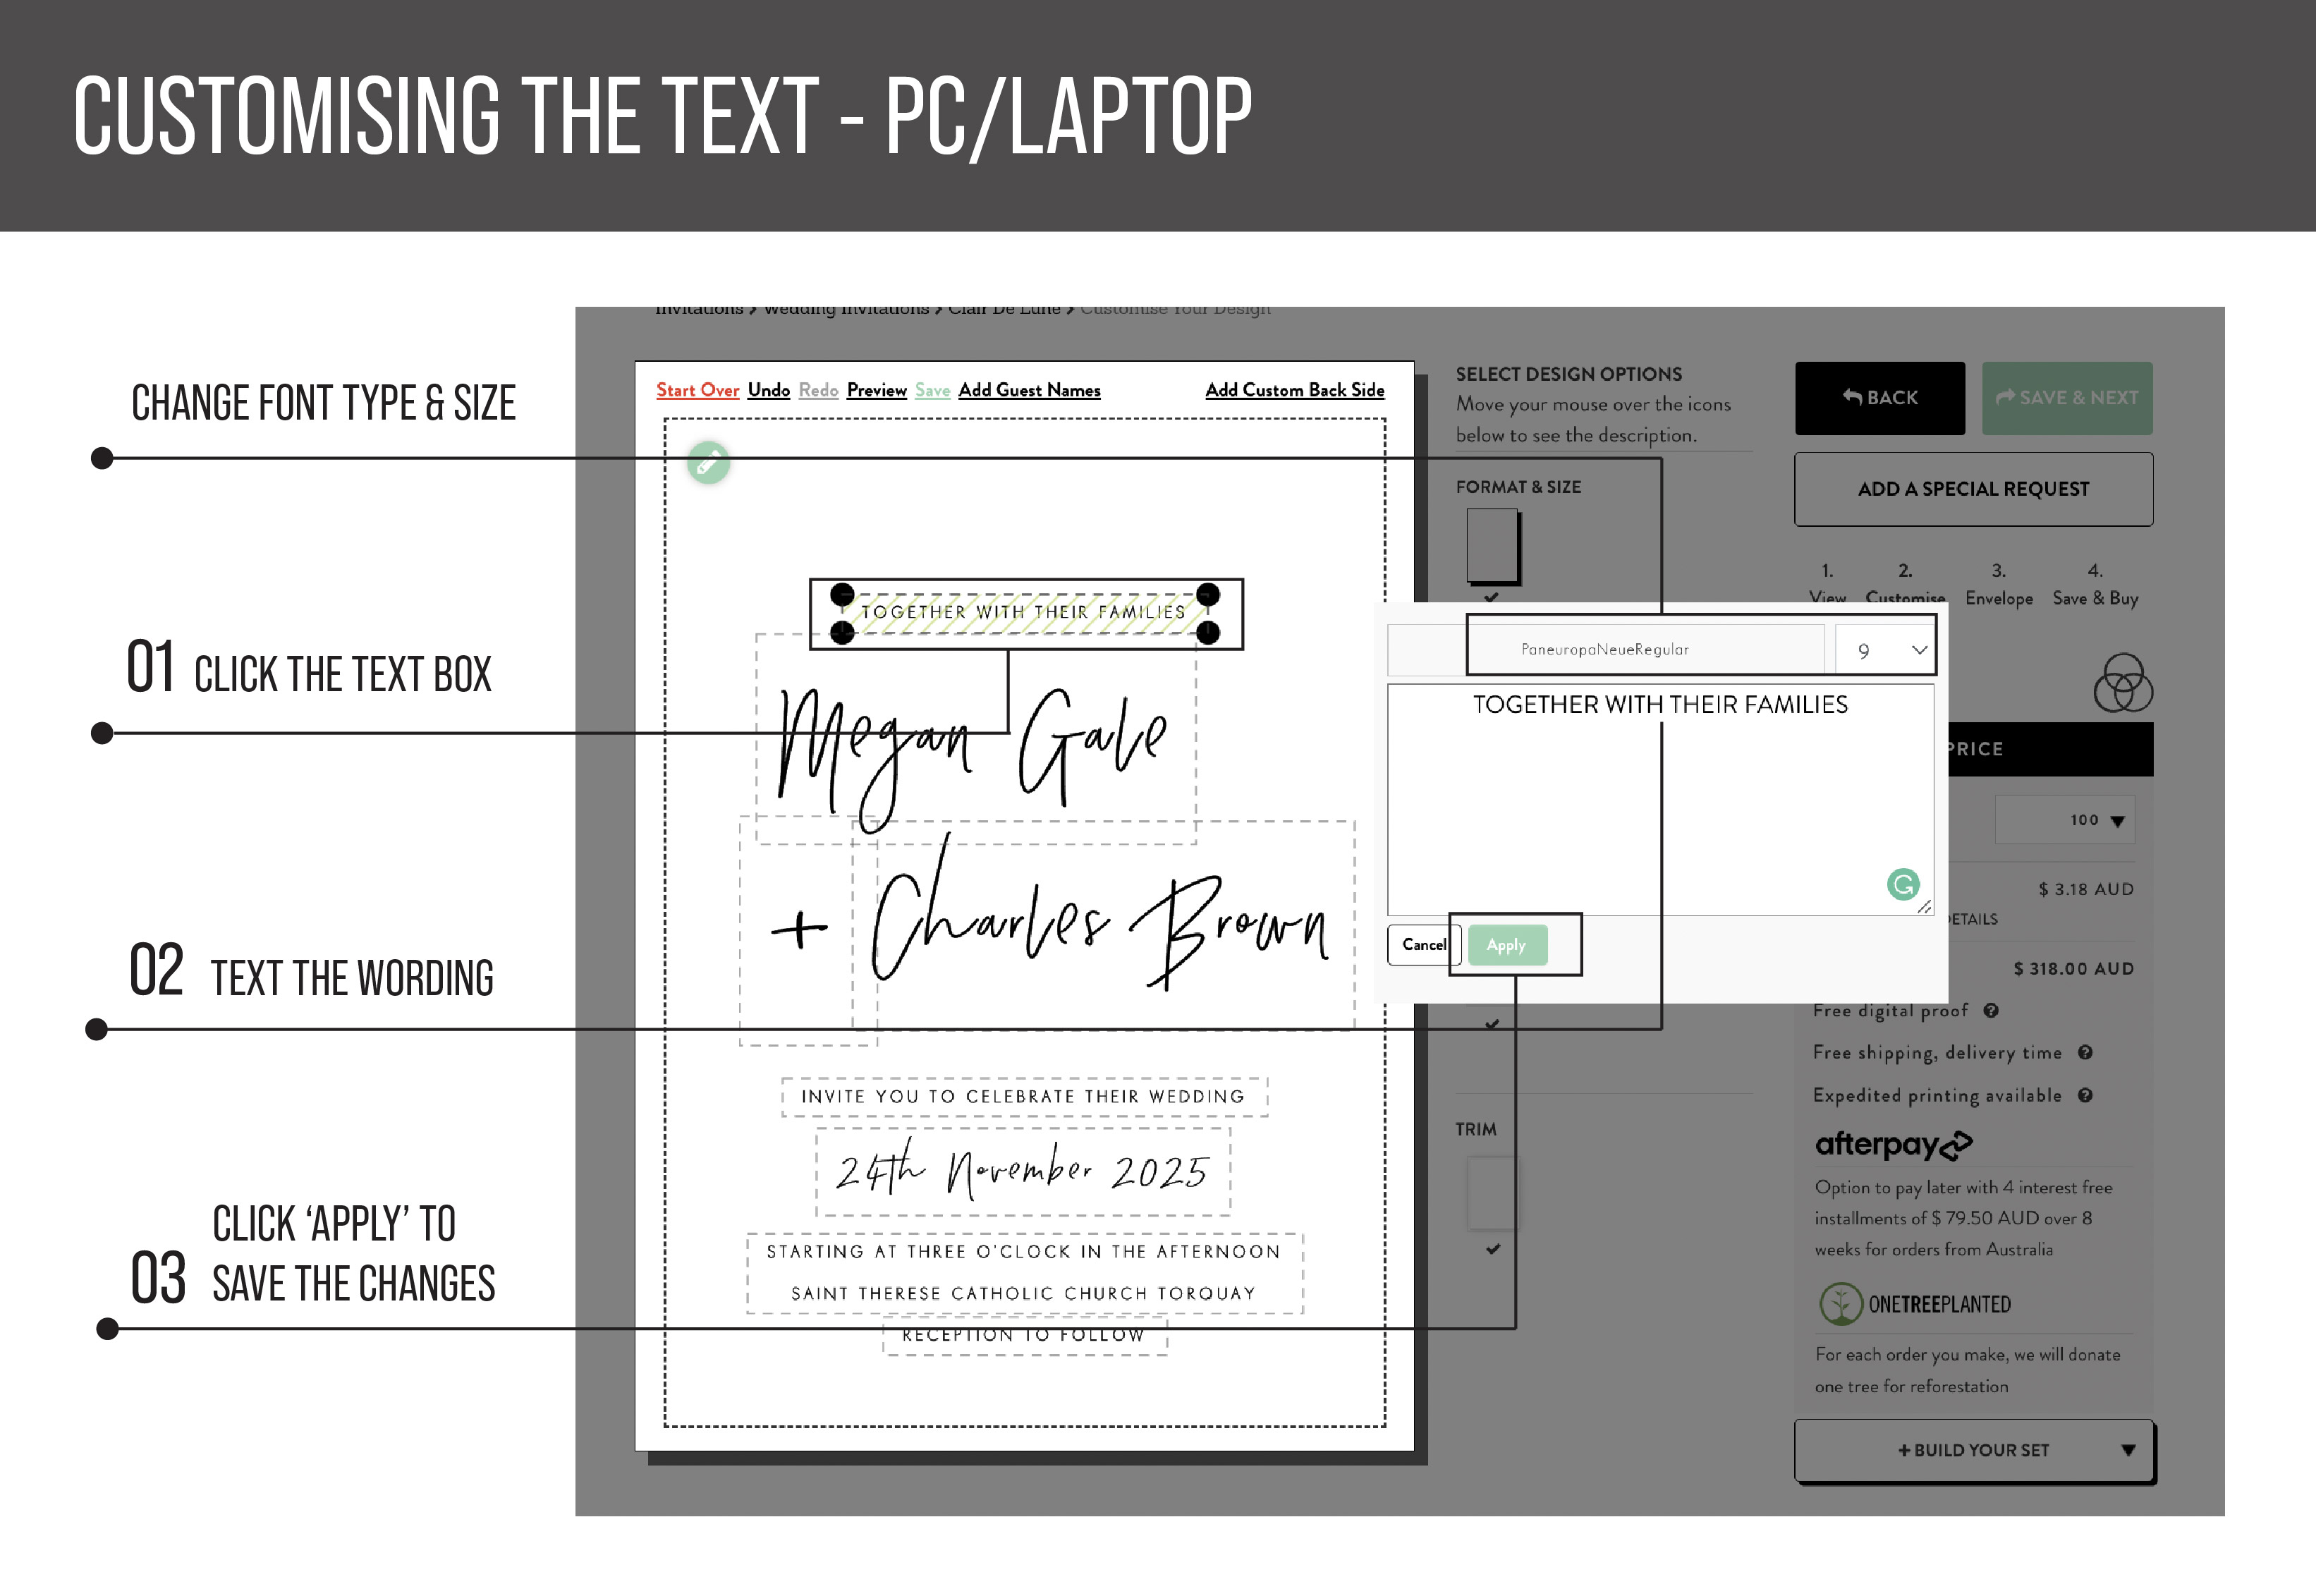
Add a backside printing to your card (if needed)
1. Click ‘Add Custom Backside’ at the top of the card preview.
2. Click ‘Add Custom Backside’ if you agree with the extra cost notification.
3. Click ‘View backside’ to go to the backside card customise page.
4. Click 'Add new text', and a pop-up text box will appear. Adjust the text's position in the design by dragging them around.
5. Click apply when you have finished editing.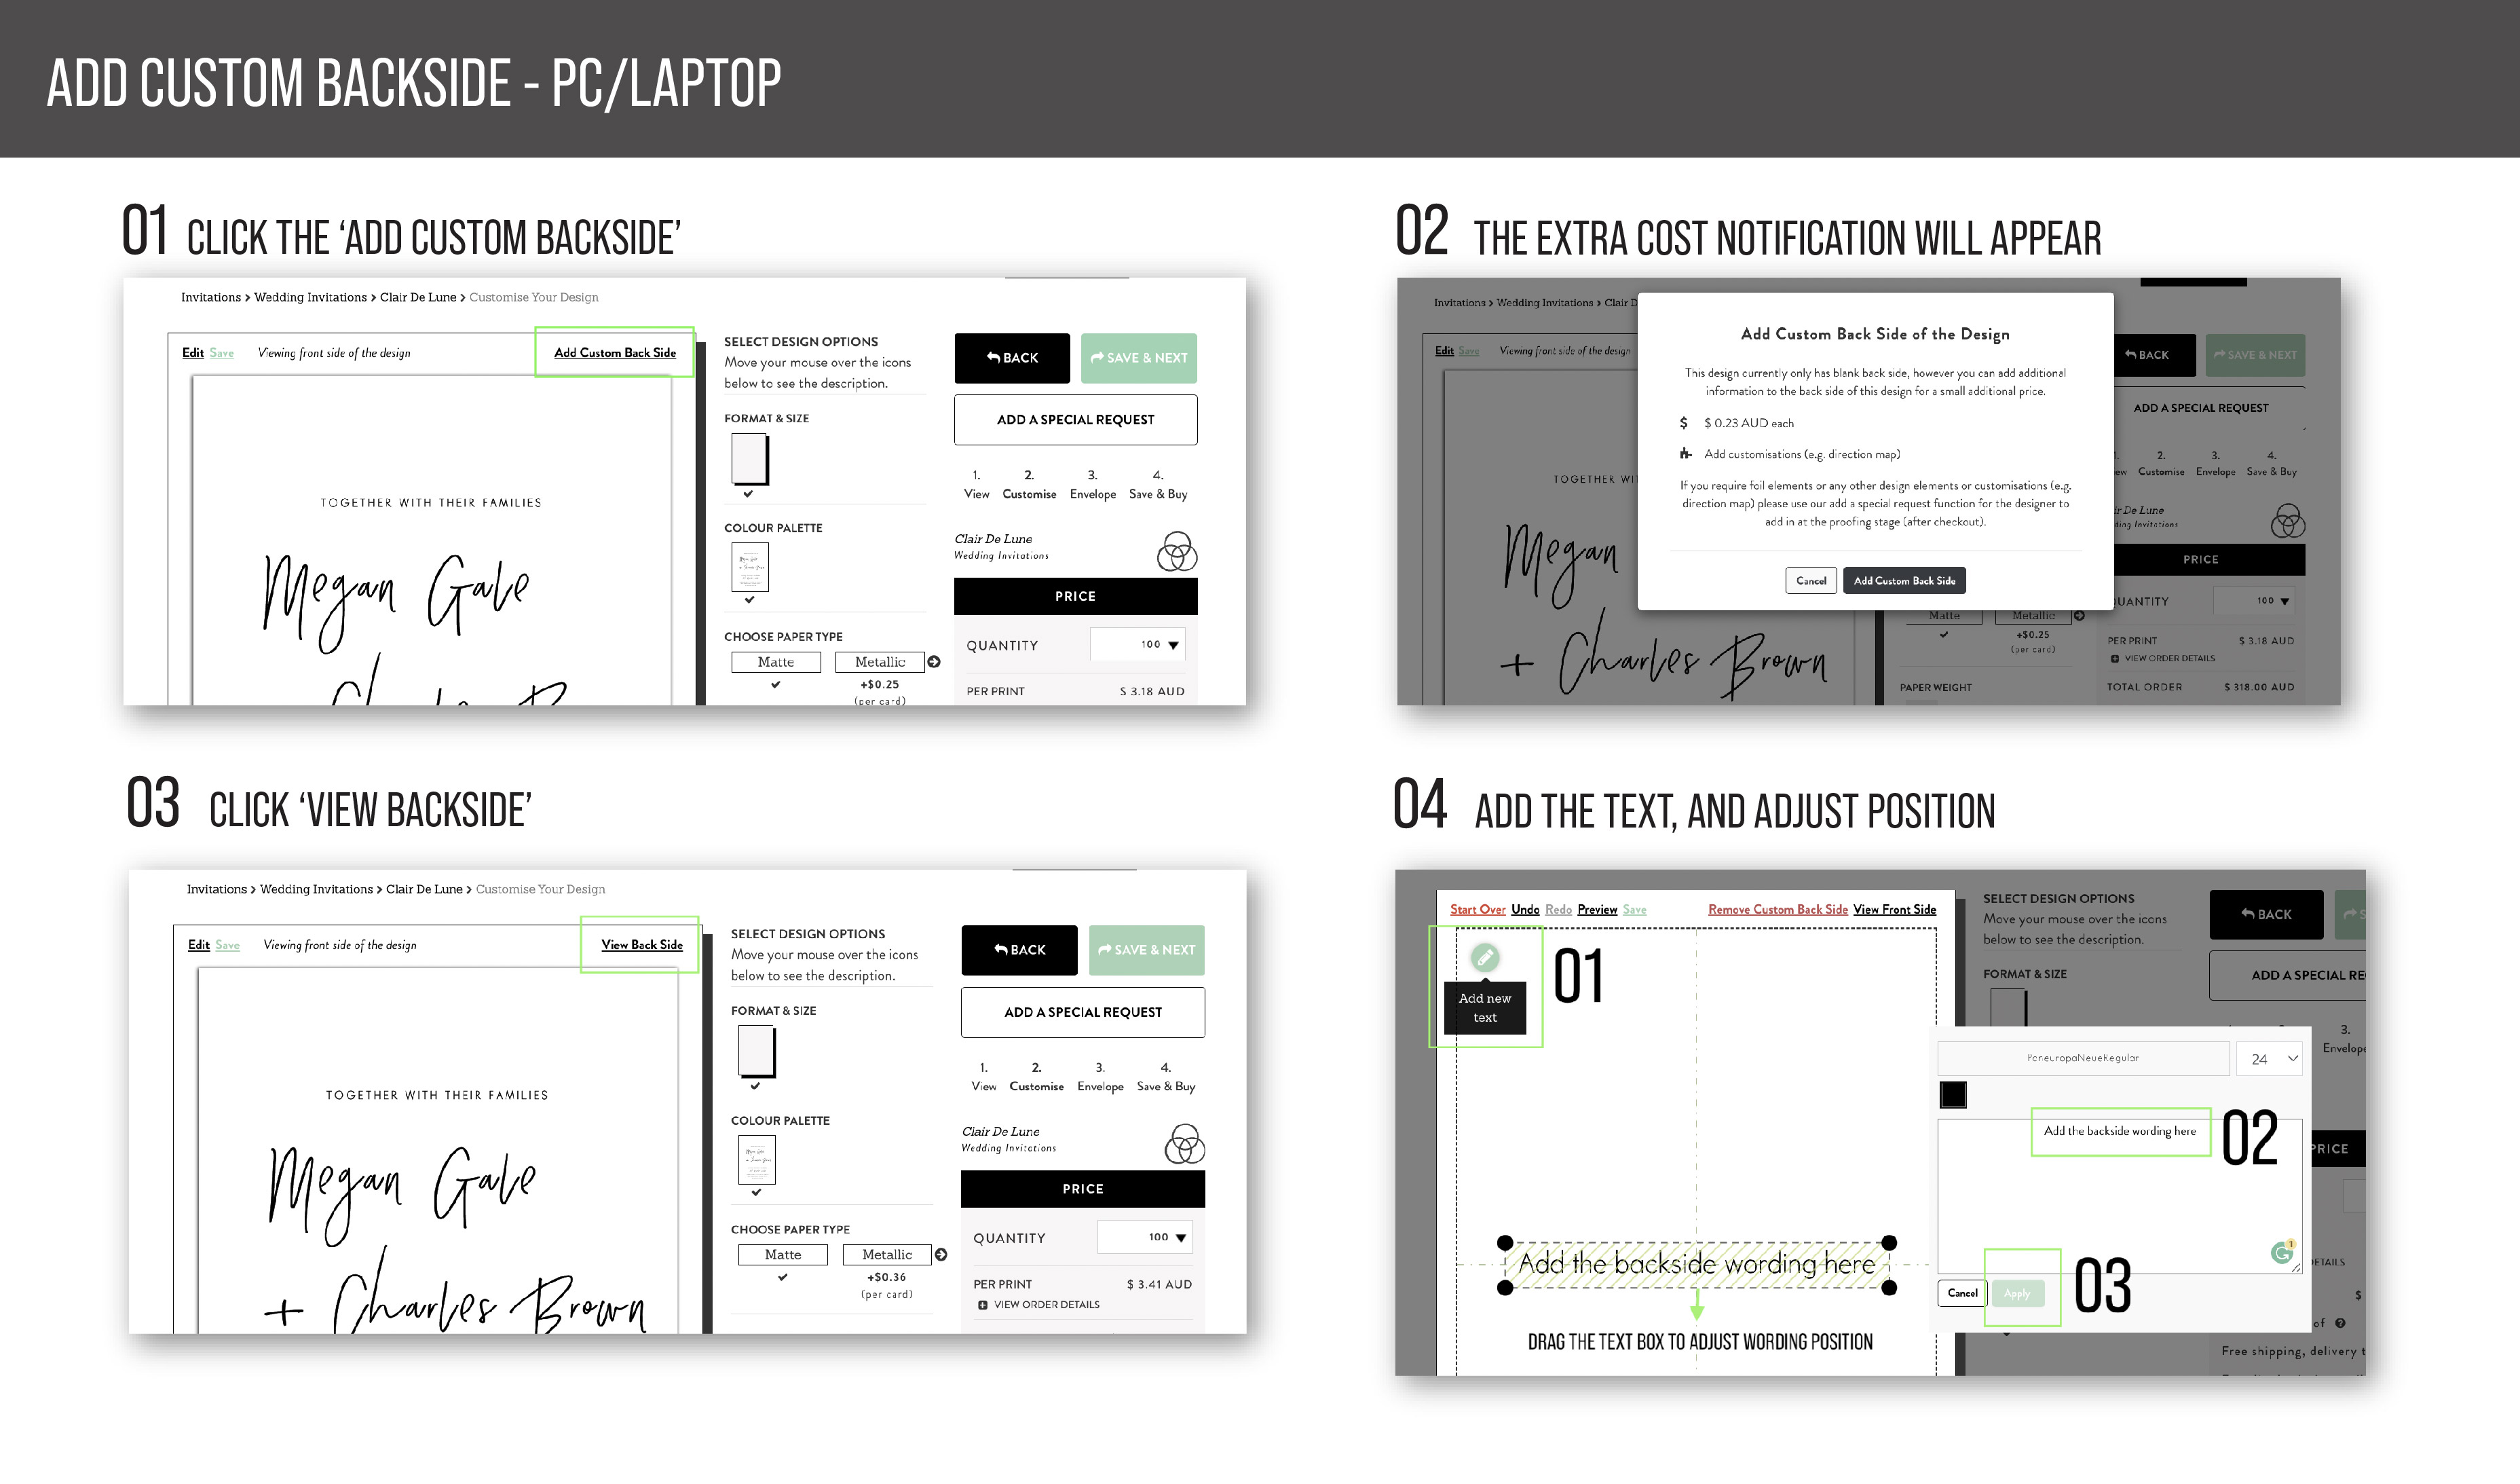
Add the personalised guest names printing
1. Click ‘Add guest names’ at the top of the card preview.
2. Click ‘Proceed' if you agree with the extra cost.
3. Adjust the guest names position on the card by dragging it to the position you’re after.
4. To submit your guest list, you can directly fill the names in the table provided or download our guest names list template in Excel format and then import the complete list once you’re ready.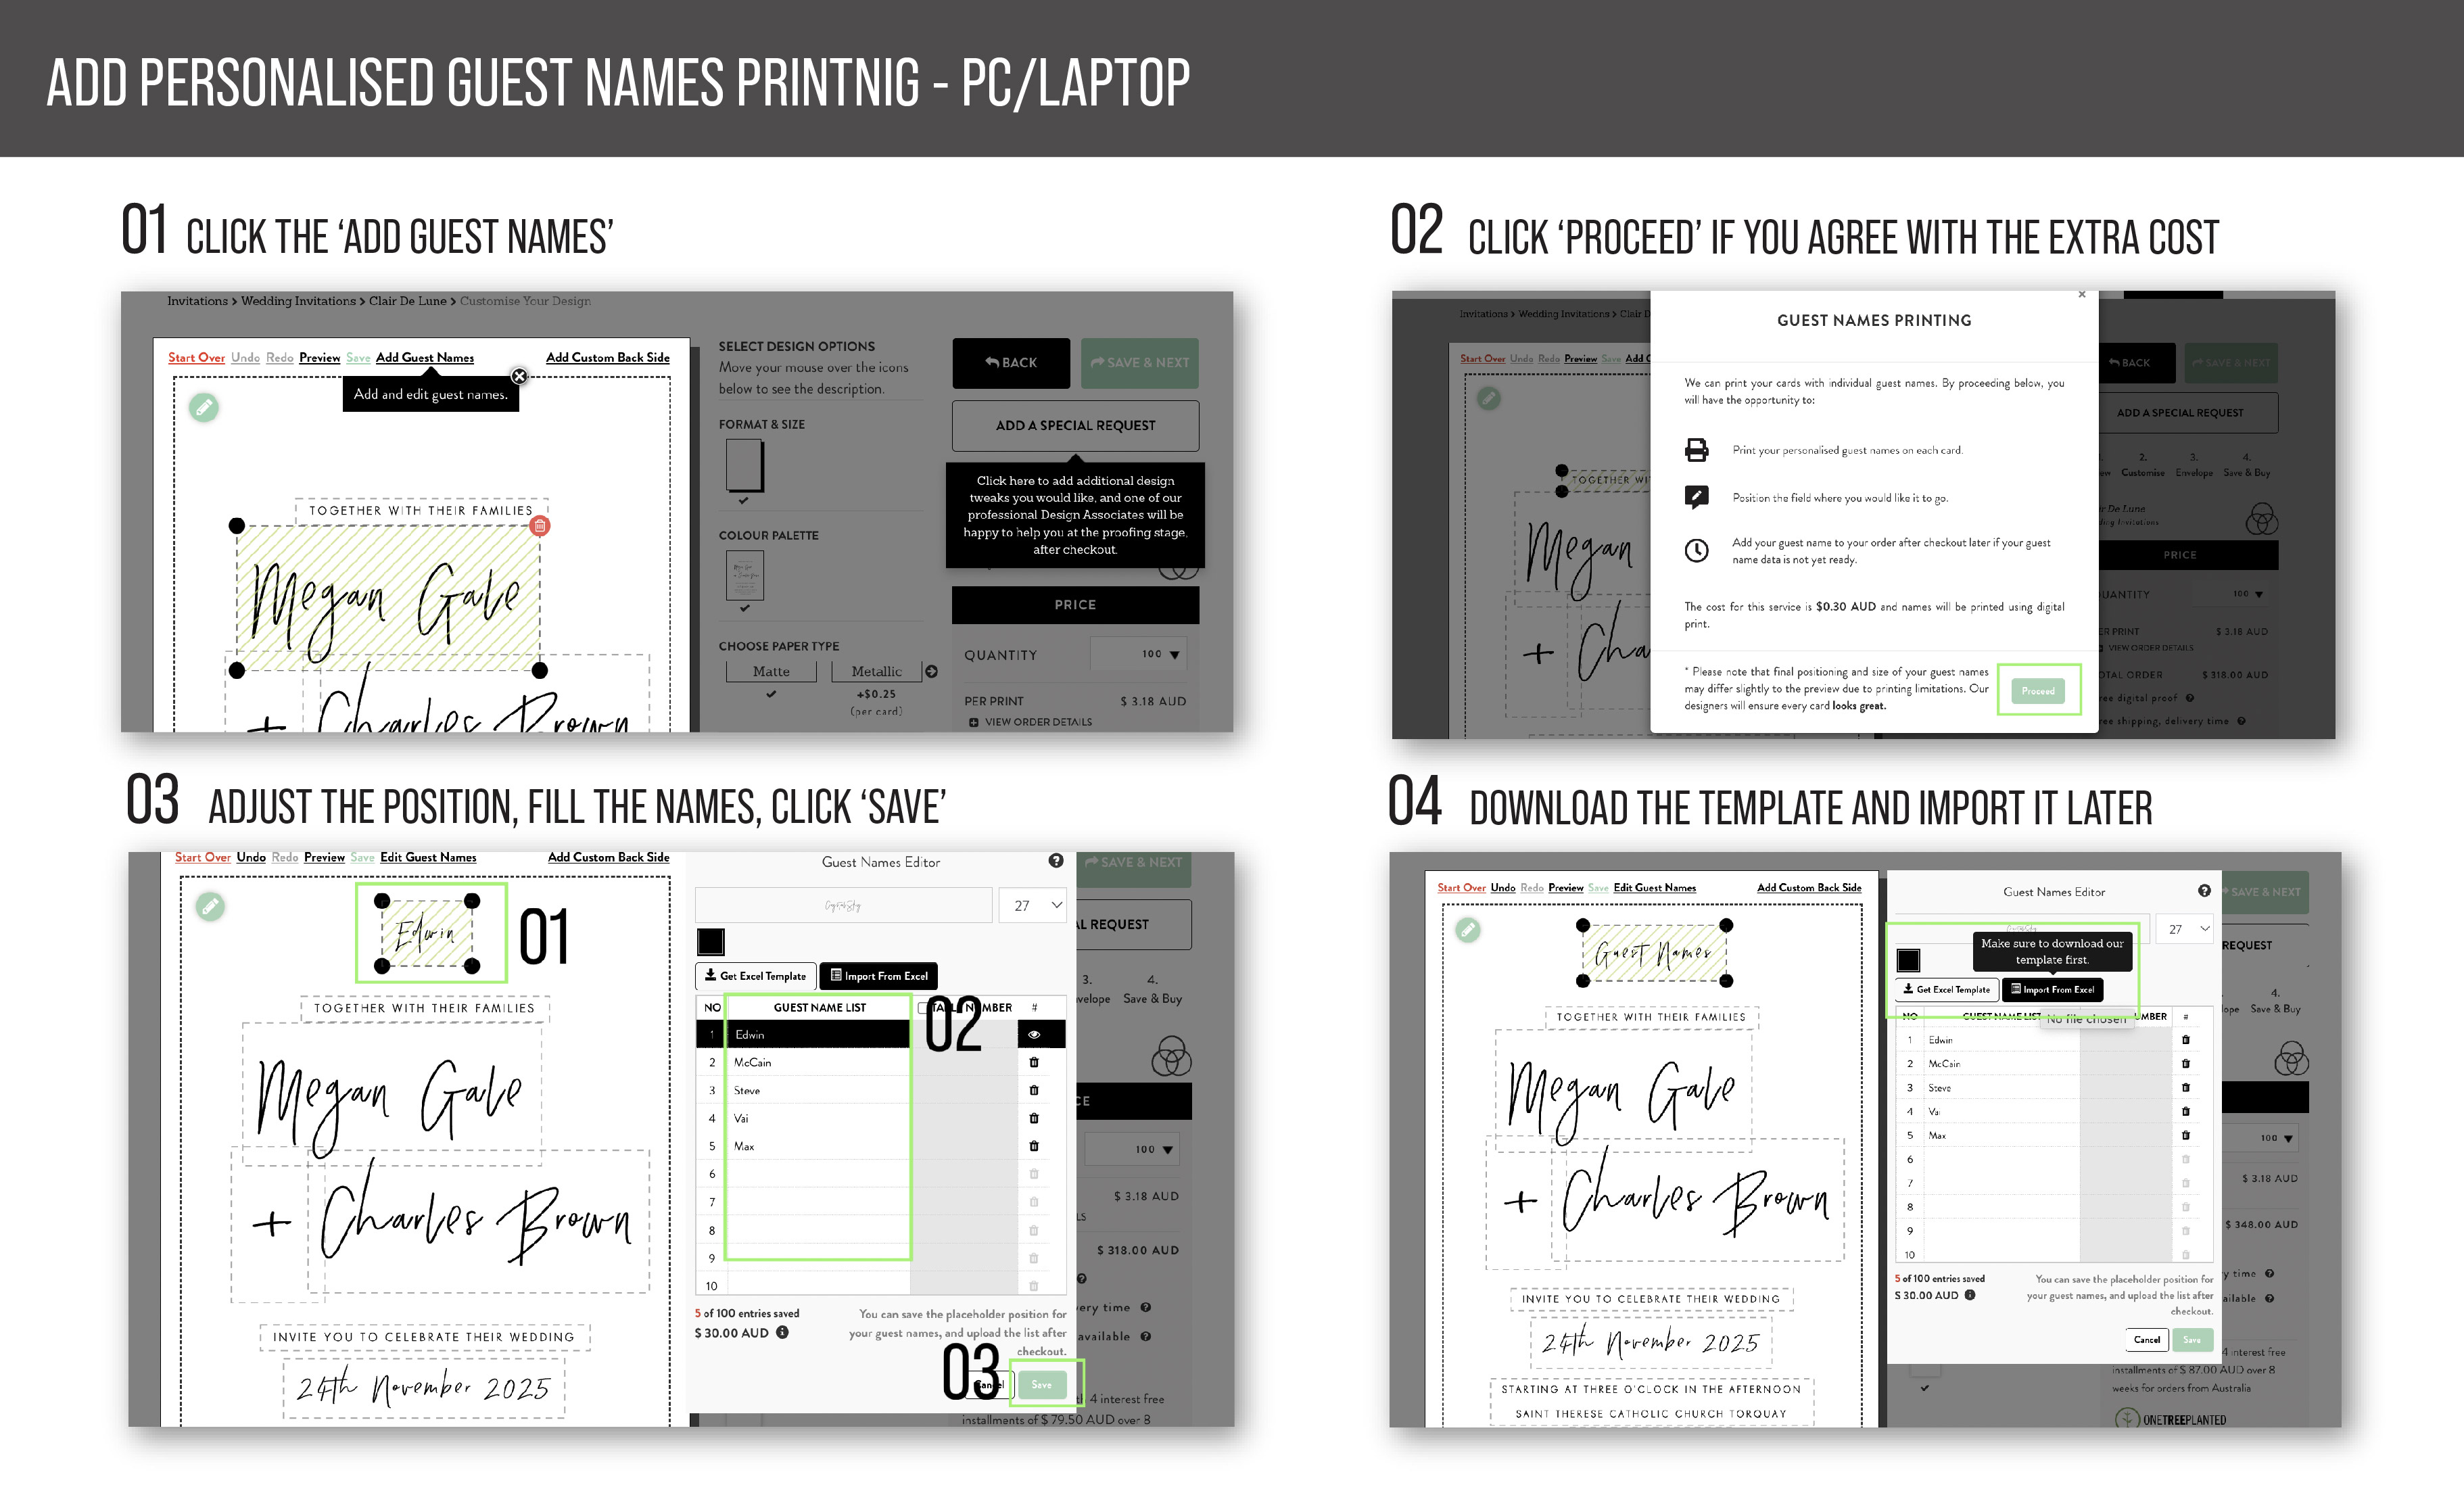
Replace an image with your own photo (For designs in photo card format)
1. Click on the generic image in the design to replace it.
2. Click ‘Upload new file’ and choose any photo from your local computer.
3. Click ‘Insert’ to add it to our photo editing tools.
4. Click ‘save’ once complete.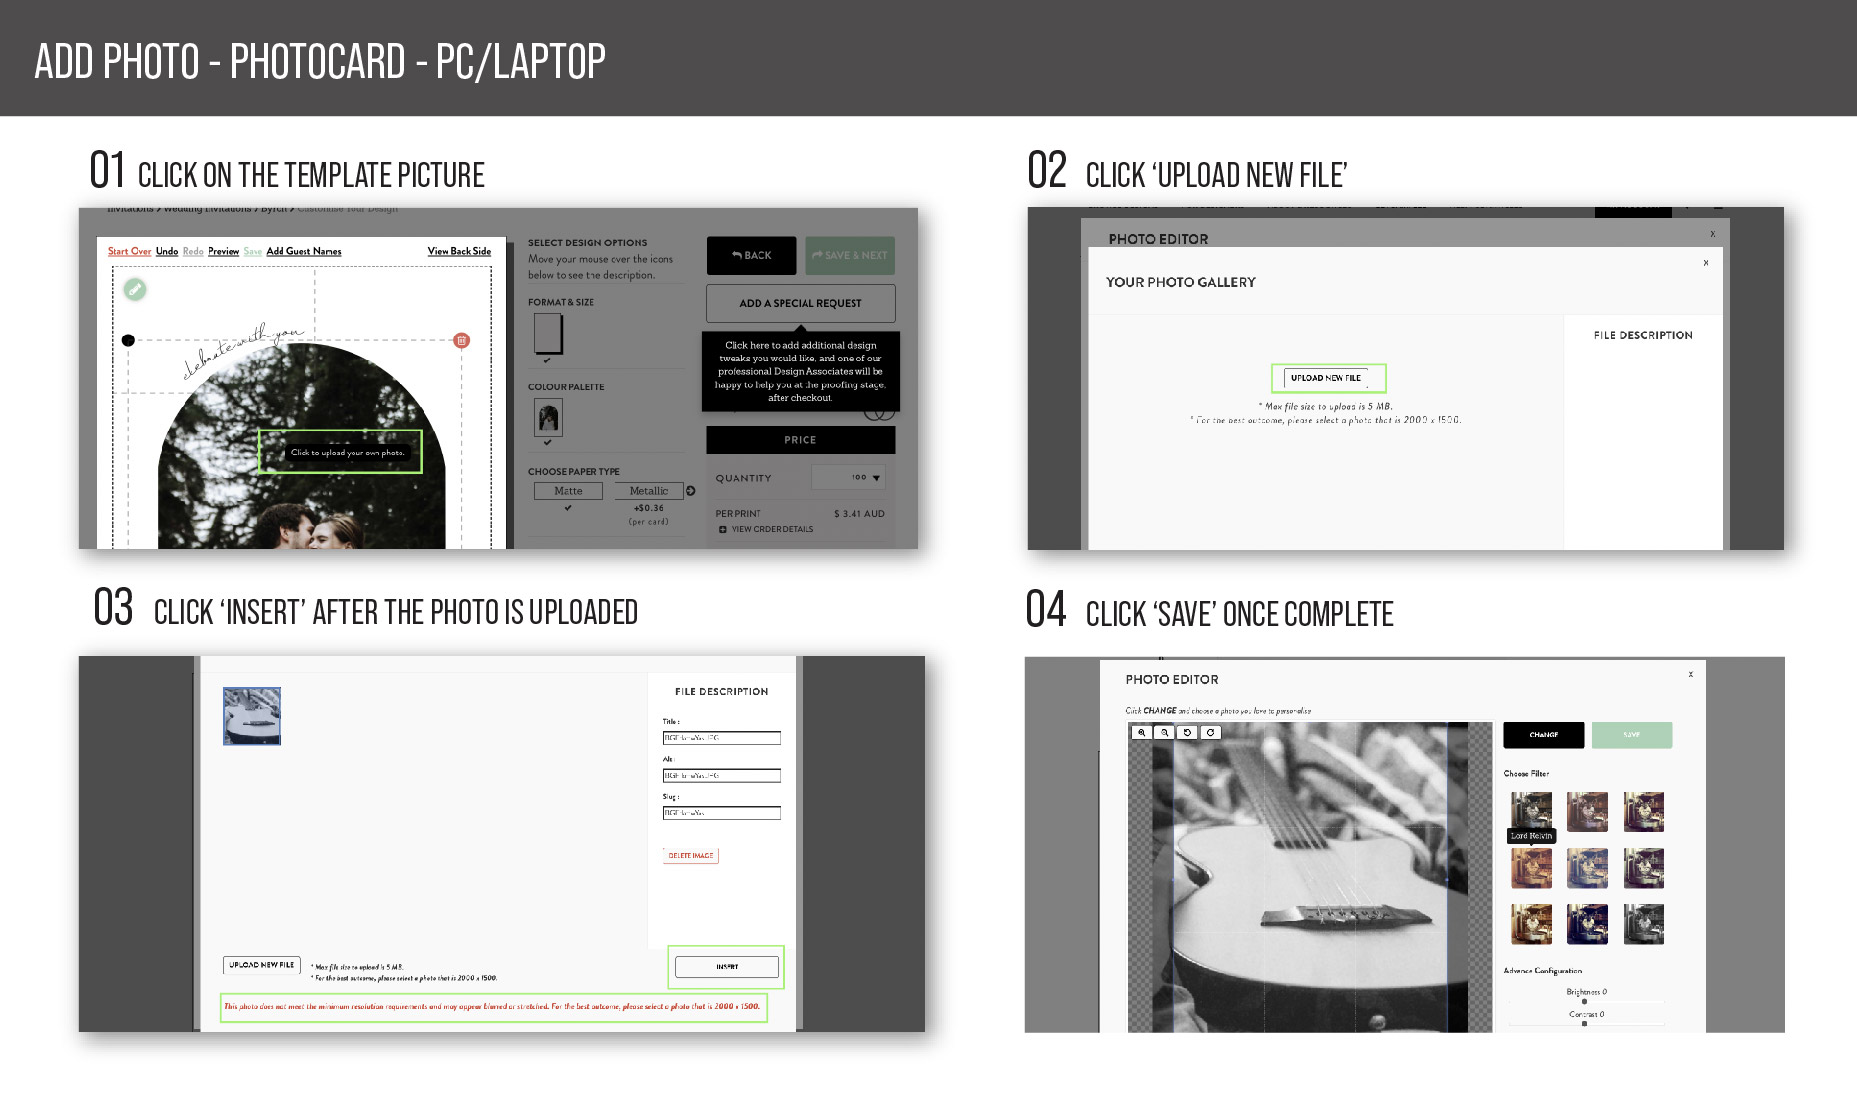
Add map/QR code/photo on the backside of any standard card
1. Click ‘Add custom backside’ at the top of the card preview.
2. Click ‘Add custom backside’ if you agree with the extra cost notification.
3. Click ‘View backside’ to go to the backside card customise page.
4. Add a note for us to add the Map / QR code / Photo and specify its position on the card.
5. Click ‘apply’ once you have finalised the editing.Providing files
- Send the screenshot of the map (which can be taken from Google Maps) as a reference to support@paperlust.co shortly after placing the order.
- Send the QR code file in .png format if possible, to support@paperlust.co shortly after placing the order.
- Send the high-resolution photo to support@paperlust.co shortly after placing the order.- Please kindly put your invoice number on your email subject.
Custom Design for Map
- There will be an additional $75 extra cost to design the map (an extra invoice will be sent later).
- This extra cost will not be applied if you send us your own map design ready to attach and print (png and pdf files are preferable).
- Custom-designed maps need a longer time to make, and it will add a few days to our design proofing stage. Please kindly expect the proof within 3 working days after you place the order.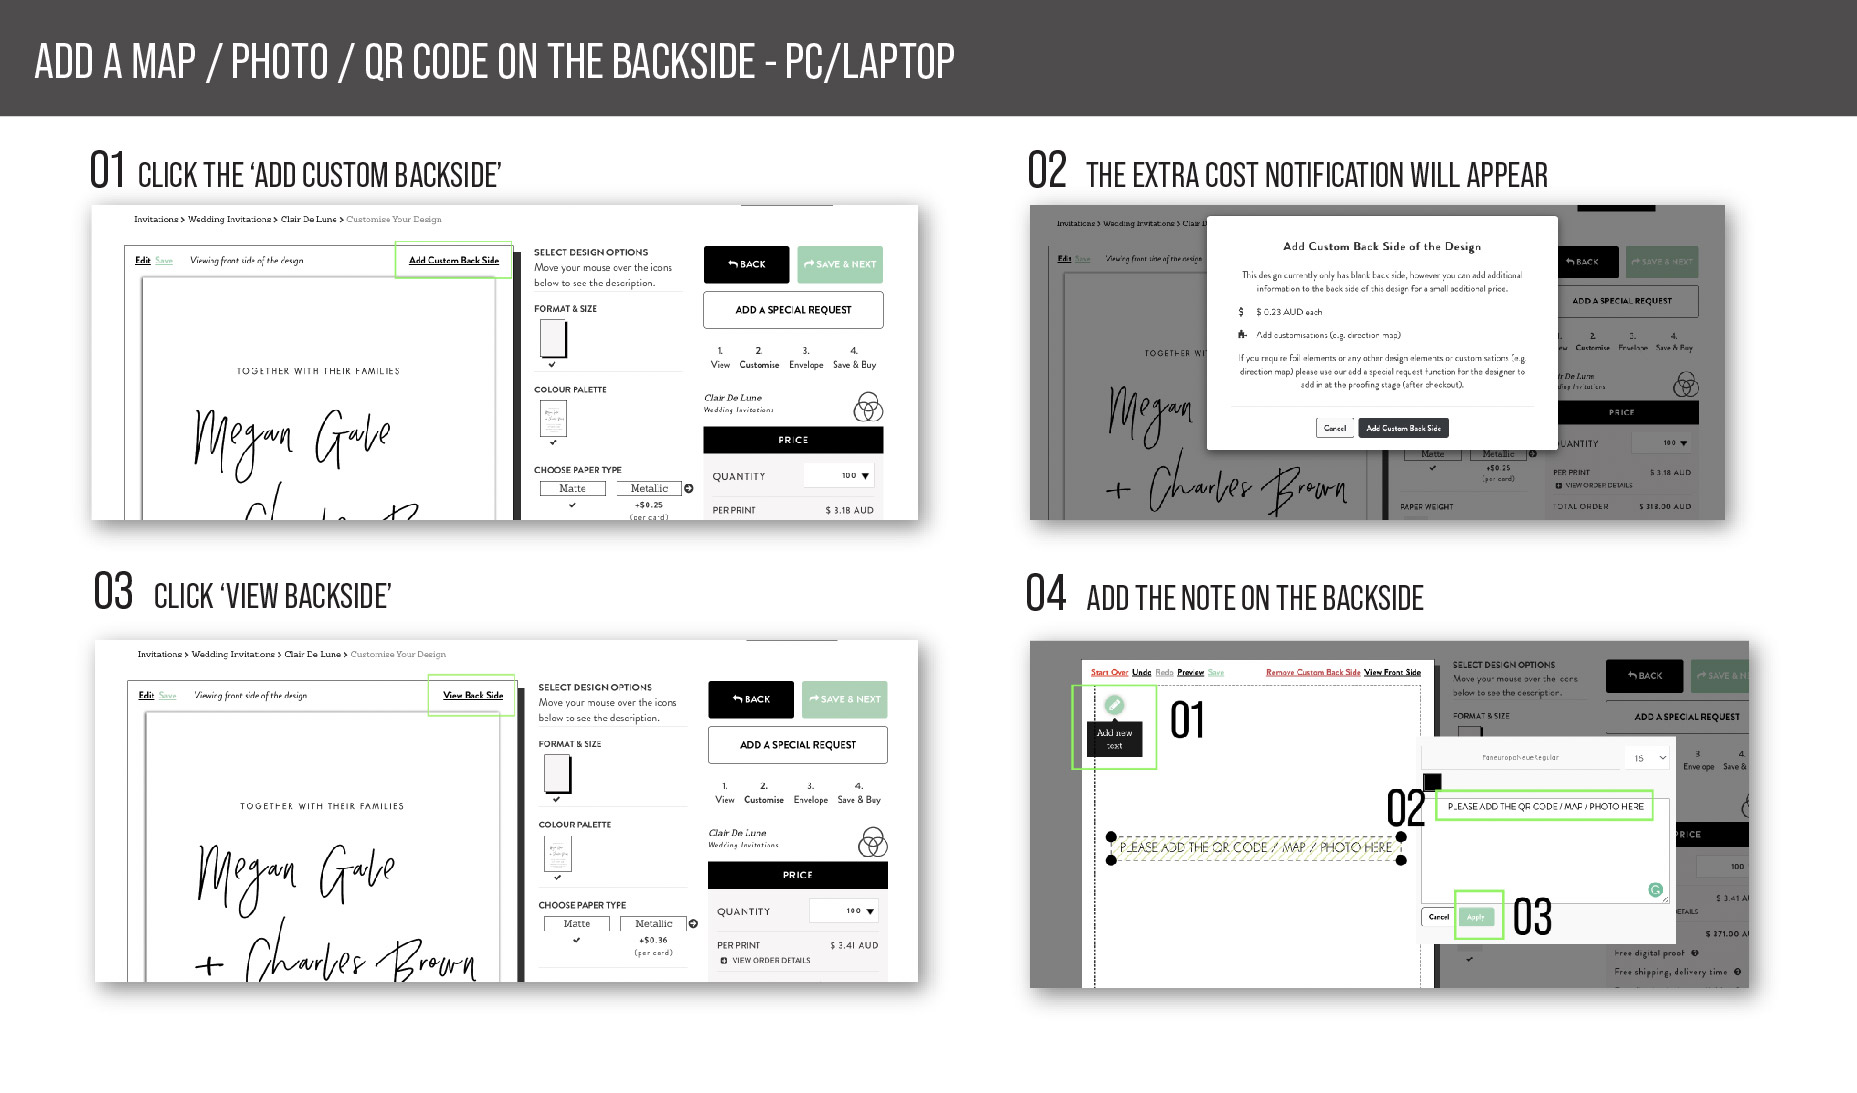
Was this page helpful?